Chat GPT is nowadays getting too much discussed over the internet due to its unique, almost accurate and human-like response. This article talks about, how to connect to Chat GPT API through Python code.
Step 1: Get an API key for the OpenAI API
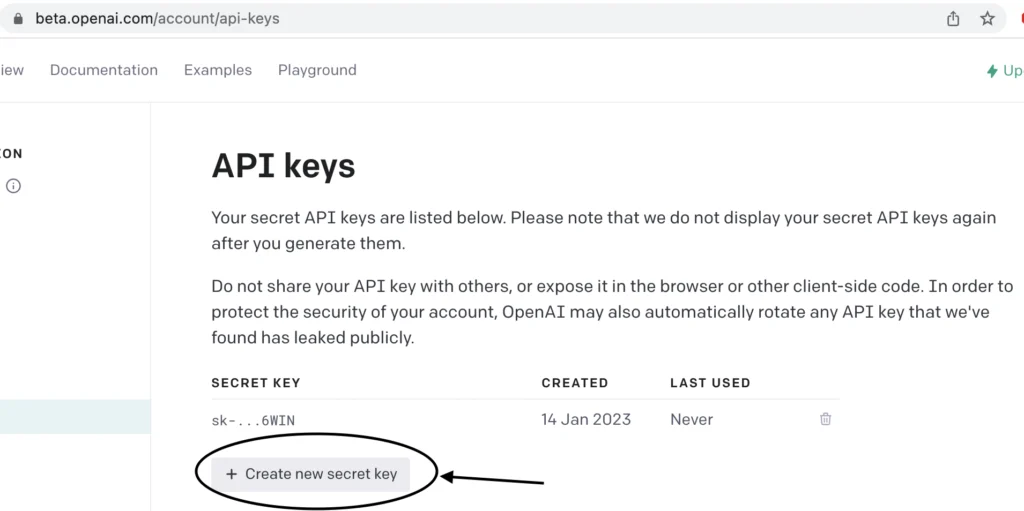
To get an API key for the OpenAI API, you will need to sign up for an OpenAI account on the OpenAI website. Once you have an account, you can create an API key by following these steps:
- Log into your OpenAI account on the OpenAI website.
- Click on the “View API Keys” button in the top-right corner of the page.
- Click the “Create an API Key” button to generate a new API key.

- Once the API key is generated, you can copy it and use it in your code to authenticate with the OpenAI API.
Step 2: Download OpenAi Library
To connect to GPT-3 via the OpenAI API in Python, you will need to install the openai library by running the following command:
pip install --upgrade openai
Step 3: Create Python code to connect with Chat GPT
You can use the open AI library to connect to Chat GPT and generate text. Here is an example of how you can use the open AI library to generate text using GPT-3:
vi HeyChatGPT #!/usr/bin/env python3
#Import open AI OS and System Modules
import openai,os,sys
openai.api_key = os.environ['api_key']
messages = [
{"role": "system", "content": "You are a helpful assistant."},
]
while True:
message = input("You: ")
if message:
messages.append(
{"role": "user", "content": message},
)
chat_completion = openai.ChatCompletion.create(
model="gpt-3.5-turbo",
messages=messages
)
answer = chat_completion.choices[0].message.content
print(f"ChatGPT: {answer}")
messages.append({"role": "assistant", "content": answer})chmod +x HeyChatGPTStep 4: Interact with chat GPT through code
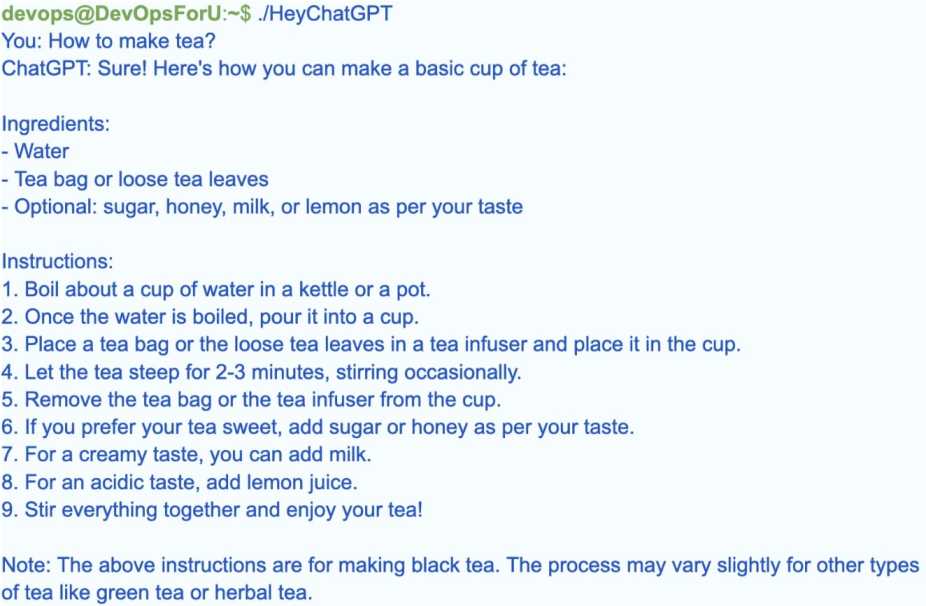
Export OpenAI API key
export api_key=xxxxxxxxxxxAccess Chat GPT API

Note: This article utilizes the new ChatGPT API engine. We can request Chat GPT API from the “OpenAI ChatGPT API Waitlist” page.
Connect to ChatGPT API with PHP code
To connect to the OpenAI API for ChatGPT, one need to have an API key and send a POST request to the API endpoint. One can use the curl library in PHP to achieve this. Here’s an example of how to connect to the ChatGPT API using PHP:
Install the php-curl library
composer require ext-curlPHP code:
Replace the API_KEY variable in the following PHP script with your actual OpenAI API key:
<?php

// Replace this with your actual API key
$API_KEY = 'your_api_key_here';

$url = 'https://api.openai.com/v1/engines/gpt-3.5-turbo/completions';

$headers = [
    'Content-Type: application/json',
    'Authorization: Bearer ' . $API_KEY,
];

// Replace this prompt with your question
$question = 'What is the capital city of France?';

$data = [
    'prompt' => $question,
    'max_tokens' => 50,
    'n' => 1,
    'stop' => ['\n'],
];

$ch = curl_init();

curl_setopt($ch, CURLOPT_URL, $url);
curl_setopt($ch, CURLOPT_RETURNTRANSFER, 1);
curl_setopt($ch, CURLOPT_POST, 1);
curl_setopt($ch, CURLOPT_POSTFIELDS, json_encode($data));
curl_setopt($ch, CURLOPT_HTTPHEADER, $headers);

$response = curl_exec($ch);

if (curl_errno($ch)) {
    echo 'Error:' . curl_error($ch);
} else {
    $decoded_response = json_decode($response, true);

    if (isset($decoded_response['choices'])) {
        $answer = $decoded_response['choices'][0]['text'];
        echo 'Answer: ' . $answer;
    } else {
        echo "An error occurred while processing the API response.\n";
        echo "Response: " . $response . "\n";
    }
}

curl_close($ch);

?>
Replace the $question variable with your question and the code will send that question to the GPT-3.5-turbo API. The response will be decoded by Chat GPT API and the answer will be printed.
Check out our new article: ChatGPT APIYou can also avail of chatGPT plus subscription at a $20 + Tax monthly price. Price may change country by country.
This article is created based on experience but If you discover any corrections or enhancements, please write a comment in the comment section or email us at contribute@devopsforu.com. You can also reach out to us from Contact-Us Page.
Follow us on LinkedIn for updates!


11 thoughts on “How to Connect to Chat GPT API”
Thank You! Was good 🙂